
Table of Contents
- Start With How You’ll Actually Cook Outside
- Outdoor Kitchen Layout Ideas That Suit Larger Gardens
- Outdoor Kitchen Zones: The Five That Make It Work
- Outdoor Kitchen Patio Design: Getting the Base Right
- Outdoor Kitchen Lighting Ideas for Evening Use
- Common Mistakes to Avoid When Planning an Outdoor Kitchen Layout
- Frequently Asked Questions
Last Updated: October 8, 2026
Start With How You’ll Actually Cook Outside
The best outdoor kitchens are planned around the cook, not the catalogue. If you want to know how to plan a luxury outdoor kitchen layout, start by writing down how you actually cook outdoors: gas, charcoal, wood-fired, or a mix of all three. That single decision shapes everything else, from worktop depth to where the wind hits.
This guide from Finescape Landscaping & Paving Ltd is built on what we see on projects across Berkshire, Oxfordshire, Wiltshire and the Cotswolds. Most designs fail for one boring reason. The layout ignores the person standing at the grill.
A luxury outdoor kitchen is a permanent, weather-ready cooking and dining area built into your garden, with fixed units, proper surfaces and services rather than freestanding furniture. It is construction, not shopping.
Below, we’ll show you how to map your cooking style, zone the space, get the base right, and light it for evenings.
Map Your Cooking Style Before You Draw Anything
Walk outside and answer four questions honestly:
- Do you grill for six people or sixteen?
- Do you want a sink and running water, or is a cool box enough?
- Will you cook in the rain, or is this a fair-weather space?
- Do you want a pizza oven, a bar, or both?
Write the answers down. Then sketch the route you’ll walk: fridge, prep, cook, serve, sit. If that route crosses a doorway or a lawn, the layout is wrong.
We mark the cook’s standing position on the ground with spray paint before any digging starts. If the route from fridge to grill feels long when you walk it, it will feel twice as long when you’re carrying a hot tray.
Outdoor Kitchen Layout Ideas That Suit Larger Gardens
Big gardens give you options smaller plots simply don’t have. The strongest outdoor kitchen layout ideas for larger spaces share one trait: they separate cooking from sitting, rather than cramming everything into one run.
Three arrangements work well:
- The L-shape. Two runs meeting at a corner. Good for a corner of a walled garden, with the grill on the long side.
- The U-shape. Three sides around a central island. Best for serious cooks who want everything within a few steps.
- The parallel run. Two facing counters with a walkway between. Ideal when you want a bar on one side and cooking on the other.
The mistake we see most is a single long straight run. It looks tidy on paper, then forces the cook to walk ten metres for a plate.
Outdoor Kitchen Zones: The Five That Make It Work
Zoning is what separates a professional outdoor kitchen layout from a row of cabinets. Every good design has five zones, and they should follow the same order as your cooking.
- Storage and refrigeration for cold drinks, food and fuel.
- Prep with a clear worktop, ideally beside a sink.
- Cooking for the grill, hob or pizza oven.
- Serving and bar where plates and glasses land.
- Seating and dining close enough to talk to the cook.
Get the order right and the space feels effortless. Get it wrong and every meal becomes a lap of the garden.
The five-zone sequence, storage, prep, cooking, serving, seating, is the single most useful planning tool in this guide. If your layout follows that order, it will work.
Outdoor Kitchen Patio Design: Getting the Base Right
Outdoor kitchen patio design decides whether your kitchen still sits level in five years. A heavy grill, a stone worktop and a pizza oven put far more load on the ground than a garden table, so the sub-base has to be built for it.
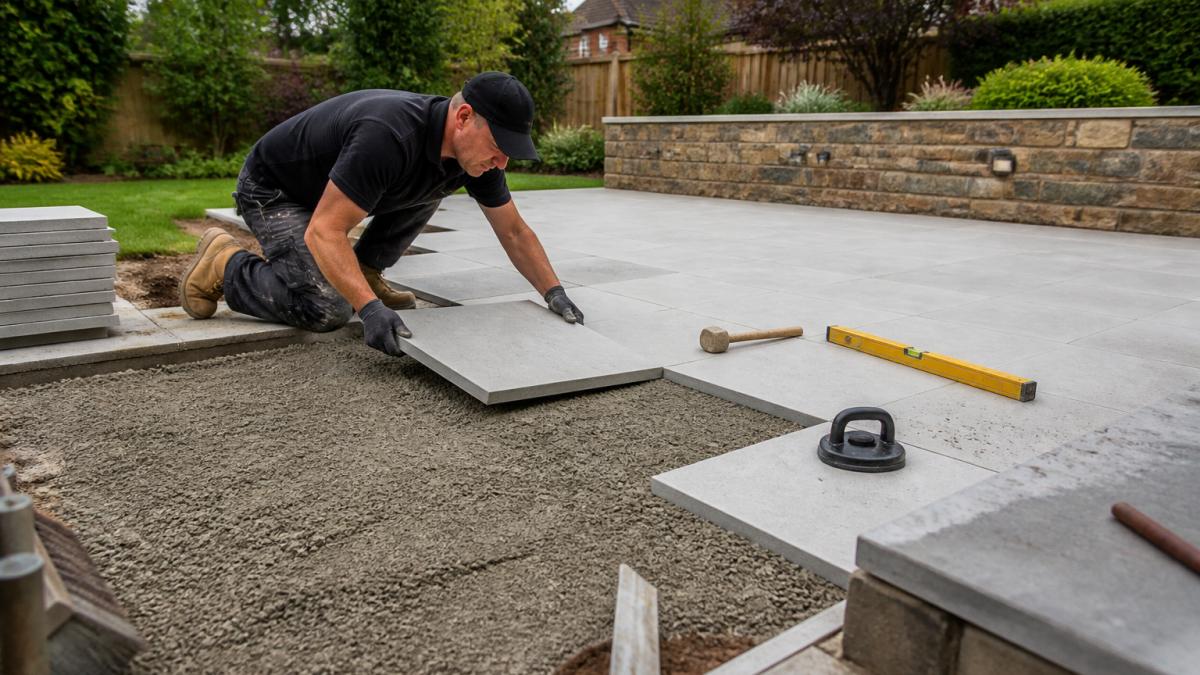
The rule is simple: dig deeper than you think you need, compact in layers, and use the right bedding. A patio that sinks under a grill is almost always a base problem, not a paving problem.
Porcelain, Natural Stone or Composite Decking
Each surface suits a different job:
- Porcelain paving handles spills, stains and frost well, and stays cool underfoot.
- Natural stone such as sandstone or limestone gives a softer, more traditional look, but needs sealing.
- Composite decking feels warmer underfoot and suits raised areas, but needs a solid frame beneath it.
For a permanent cooking area, porcelain is usually the most practical choice. It copes with grease, ash and British weather without much fuss.
Drainage, Levels and Groundworks
Water is the quiet killer of outdoor kitchens. The patio needs a fall away from the house, and the kitchen units need to sit above the surrounding ground.
Plan for:
- A fall of roughly 1:60 to 1:80 on the paving.
- A channel drain or soakaway where the patio meets the lawn.
- A solid base under any unit carrying a grill or oven.
Do this at the groundworks stage. Retrofitting drainage under a finished patio is expensive and messy.
Never let a builder lay a patio tight against the house with no fall and no drainage. Water pools, finds the wall, and you get damp inside. It is one of the most common and costly mistakes we’re asked to put right.
Outdoor Kitchen Lighting Ideas for Evening Use
Good outdoor kitchen lighting ideas do three jobs: help you cook safely, light the table, and make the space feel warm after dark. The trick is layering, not flooding.
Use three layers:
- Task lighting under wall units and over the grill so you can see what you’re cooking.
- Ambient lighting in the form of low-level uplights on walls and planting.
- Accent lighting for steps, level changes and feature trees.
Keep the light warm, around 2700K, and put it on separate circuits so you can dim the ambient layer once the food is served.
Common Mistakes to Avoid When Planning an Outdoor Kitchen Layout
Most costly mistakes happen on paper, long before a spade hits the ground. Watch for these:
- No wind plan. A grill in an exposed corner won’t light on a breezy evening.
- Too little worktop. Aim for at least 60cm of clear prep space either side of the grill.
- Ignoring the fridge run. Cold storage should sit near the seating, not across the patio.
- Skipping the base. A cheap sub-base under a heavy kitchen is a guaranteed call-back.
- Forgetting power and water. Run services before the paving goes down, not after.
Get these right and the layout will serve you for decades.
Planning a luxury outdoor kitchen is really a construction project wearing a hospitality hat. It needs the right zones, a properly built base, sensible drainage and lighting that works after dark. That is exactly the work Finescape Landscaping & Paving Ltd does, from landscape design and porcelain paving to drainage, groundworks and bespoke garden lighting. If you’re planning a larger garden transformation and want the layout right the first time, get in touch with Finescape Landscaping & Paving Ltd and we’ll take it from design through to completion.
Frequently Asked Questions
What zones should an outdoor kitchen include?
A workable luxury setup usually has five: a cooking zone with the grill or pizza oven, a prep and cold storage area, a bar or serving counter, a dining space, and a lounging area. Keep the first three within a few steps of each other so you are not walking back and forth with hot dishes. The dining and lounging zones can sit slightly further out, ideally on the same paved level so guests move between them without tripping on steps.
How much space do you need for an outdoor kitchen?
For a luxury layout, allow around 4 metres of run for the main cooking and prep counter, with at least 1 metre of clear standing room behind it. A bar or island needs roughly 1 metre of circulation on every side. Add the dining area on top of that. In larger gardens there is usually room to spread these out, but keeping the working triangle tight matters more than overall footprint.
Which materials work well for an outdoor kitchen?
Porcelain paving is a strong choice for the patio because it handles frost, resists staining and stays cooler underfoot than many alternatives. Natural stone suits period properties and country gardens. For counters, granite, quartzite and porcelain worktops cope with weather better than timber. Brickwork and retaining walls should be built on a proper concrete footing, and any timber or composite decking needs a ventilated sub-frame so it does not sit in standing water.
How do you protect an outdoor kitchen from the weather?
Plan for a covered or partially covered structure such as a pergola with a solid roof section, and choose stainless steel hardware rated for outdoor use. Make sure the patio falls away from the house at roughly 1:80 so water drains to a soakaway or channel drain rather than pooling under the units. Detachable covers for the grill and a frost-proof tap for the sink extend the life of the whole setup.
